
Adobe Photoshop Applications come with multiple preset patterns that are fun to use but only cater to a select number of themes. They are great to have when designing scrapbook pages, layouts, templates, and many other projects. It may seem as though the pre-installed patterns only give you few options to build with. However, the Adobe Photoshop software allows you to increase your patterns inventory by designing your own. There are multiple ways of doing this, but in this post, I will show you one of the ways that I create mine.
The Process
The first thing I do is open the application. I’m using a Windows PC. The software version I’m using is Photoshop CC 2019. I click “File”>”New”. The “New Document” box opens.
There you can choose which type of document you want to create. I choose “Print” on the Document menu bar at the top. Under “Preset Details” I leave the default “untitled-1” name. I also keep the default settings of 8.5” width x 11””height”. I changed the resolution from 72 pixels/Inch to 300 pixels. I also make sure that the color mode is set to “RGB Color” and the background is “white”. Then I click “Create”.

When the document opens, the background layer is automatically white, and it is locked. I’m then going to add a new layer in the “Layers” Panel to the right. You can do this by either clicking on the “new layer” icon at the bottom right of the Layers Panel, or by clicking “Layer”>”New”>”Layer” on the menu bar at the top, or by using your keyboard shortcuts “Shift+Ctrl+N” on a PC or “Shift+Command+N” on a MAC. I will label this background because the original white background layer will get deleted at the end of the design.

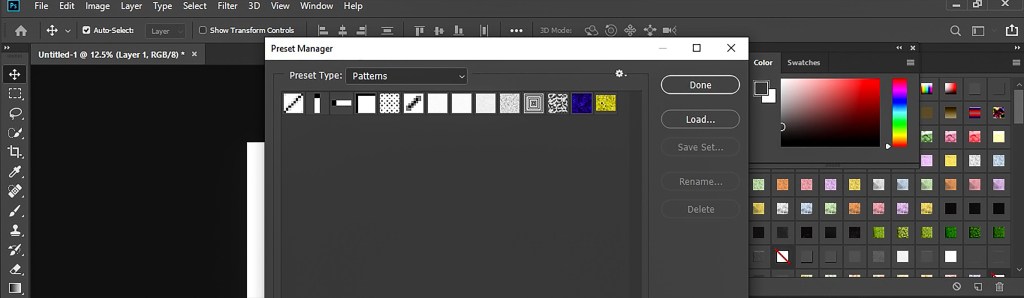
Once the new layer has been created, we will begin to design the pattern. There are a few ways of accessing your patterns library. A very common method is by going to the menu bar and clicking “Edit”> “Presets”> “Preset Manager”. The Preset Manager panel opens. Using the drop-down options, you can choose the “Type” of preset you want. In this case we want “Patterns”. The files in the “Patterns” library appear. You can see what is already loaded. You can also access your Patterns another way.
It is helpful to have the “Tool Presets” window open. Some may find this method of finding your tools as a good option. To add icon to the panel then follow these steps. If it is already available, or you don’t want it open, then skip to the section “Designing The Pattern”.
Opening the Tool Presets Icon
Step 1
On the menu bar go to “Window”> “Tool Presets”. Ensure that “Tool Presets” is checked.

Step2
Once it is, you will be able to easily access it using the Tool Presets icon, as shown below.
Step3
Simply click on the options menu (three stacked lines) to view the preset manager.

Step4
Once in the Preset Manager Panel, choose the “Patterns” option from the “Preset Type” drop down list.

Here you will see your installed patterns. There are just a few available. We can now design our own.
Designing The Pattern
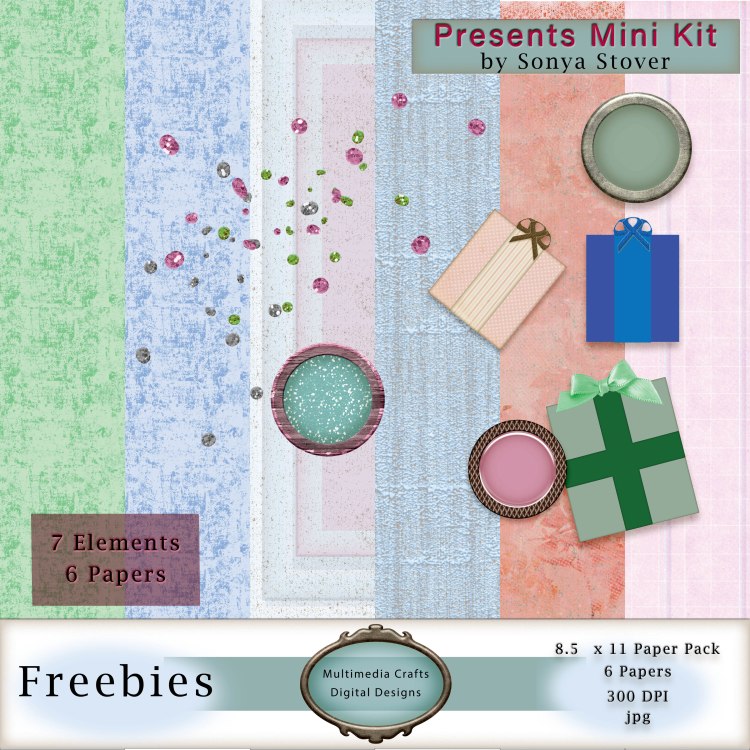
Open a PNG file. For this illustration, I will use the blue present from the freebie graphics kit (Presents Mini Kit), from this site for the pattern design.
Click “File”>” Open”> choose the file to use. With your file open, use the keyboard short cut keys to copy [(Ctrl + C) on a PC or (Command +C) on a Mac] and paste it [(Ctrl +V) PC or (Command +V) Mac] into the “untitled-1” file.


With the graphics layer selected, make another copy of it using the keyboard short cut Ctrl + J or Command + J on a Mac. Click and drag the copied image above the original one.


Make about seven more copies. Click and drag them on various parts of the page.
Now click on Layer 0 or the bottom white layer and delete it. Then highlight all the remaining layers. To highlight all the layers, simply click on the bottom layer, scroll to the top layer, and hold the “Shift” key and left click at the same time.

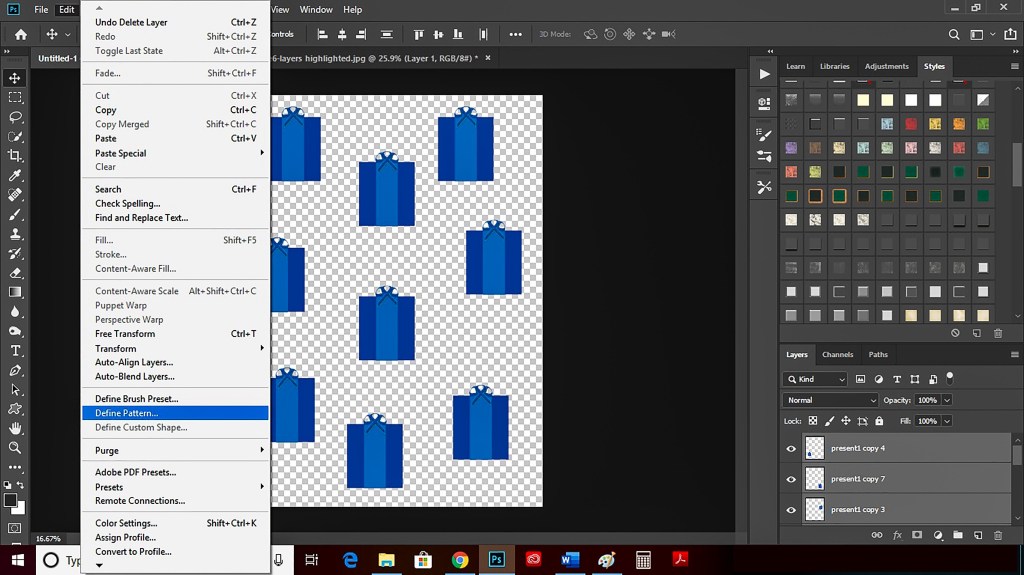
We will now finish up the pattern. With all the layers selected go to “Edit”> “Define Pattern”.

Give your pattern a name when the Pattern Name dialogue box opens. I will name mine presents. Then click “ok”.
Now you can test your pattern. Open a new document. In the layers panel click on the white background layer. On the Menu bar go to “Layer”> “New Fill Layer”>” Pattern.

The “New Layer” dialogue box opens. Click “ok”. You will then see the “Pattern Fill” dialogue box. You can scale the percentage of your pattern up or down using the drop-down menu beside “Scale” (arrow). At 100 percent it looks identical to the size of the pattern you just created. By scaling it larger (moving the handle to the right) it makes the images bigger, and less filled on the screen. By dragging your handle to the left, the images are scaled smaller, and fill the page more, as shown in the photo below. I typically make mine smaller for my digital scrapbook papers. In this illustration I scaled mine down to 23 percent. When you are satisfied with the size you want click “ok”.

You can view your pattern by following the same steps from above by accessing the Preset Manager. Your pattern will be the very last one in the file.

This technique can be used from various files, brushes, shapes, and more. I will cover those in other tutorials. I hope you found this post helpful. And as always, happy crafting!

