
I like to make many of my holiday decorations by using different items from various sources. Today I’m going to show you how I made my Santa Clause Canvas. I got this idea from the YouTuber May May Made It Crafts She is a very inspiring artist.
Supplies Needed
- What you will need is an 8” x 10” light weight cotton duck canvas. I got mine from Michaels in a pack of “Artist’s Loft” 10+2 Super Value Canvas Pack on sale. Mine is archival, acid free, and was titanium acrylic gesso primed.
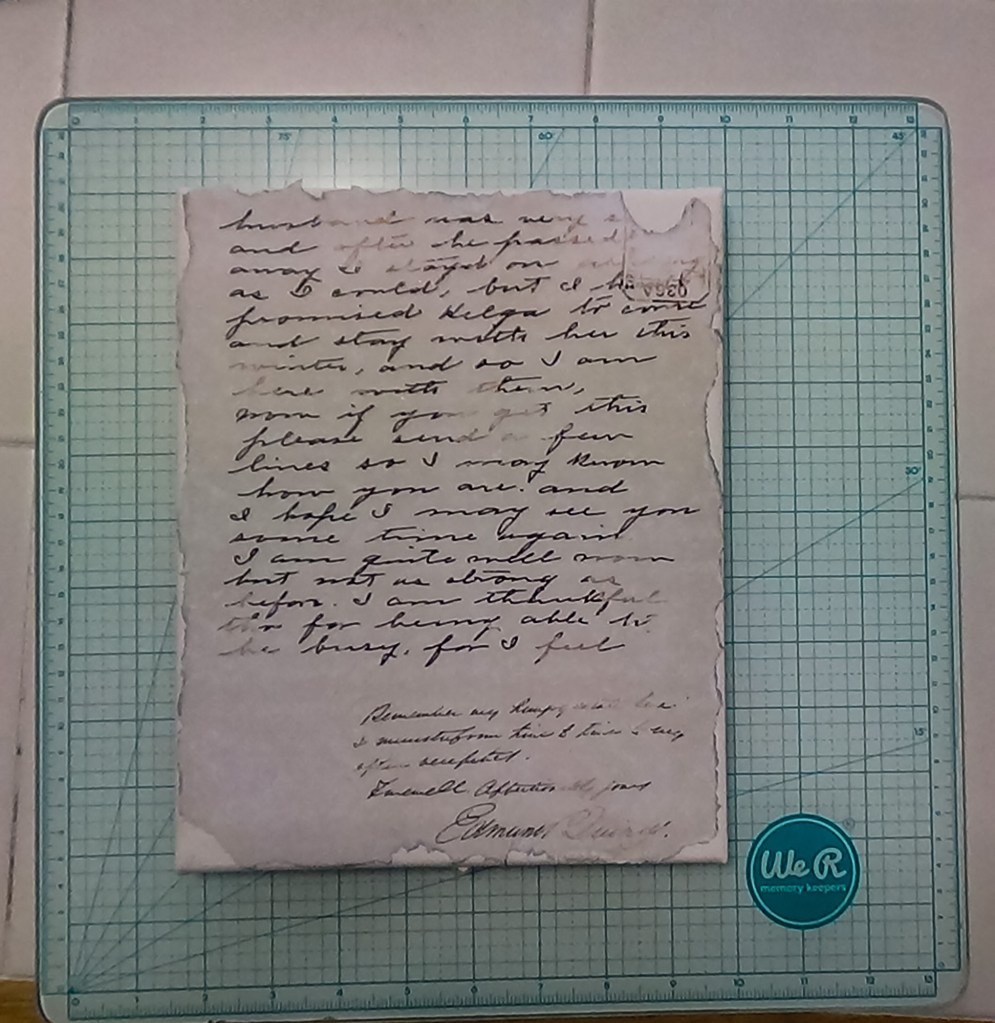
- You will also need a background designer paper. I used a sheet from my commercial use digital 8.5” x 11” collection “Vintage Script” in my etsy store multimediacraftsdigi.etsy.com.
- I had the sheet printed out on a laser printer at Staples, since my printer at home is inkjet. I prefer to use laser jet instead of inkjet printing on mixed media projects like these to avoid ink bleeding when wet substances like modpodge glue or gesso is added.
- In addition to your canvas and background paper you will need a big paint brush and smaller ones (I used a 3” one made by plaid and the smaller brushes came in a kit by Daler Rowney, “Artist Choice Value Set”)
- white gesso
- modpodge glue
- a napkin with your preferred holiday image
- some stencils
- modeling paste or thick paint
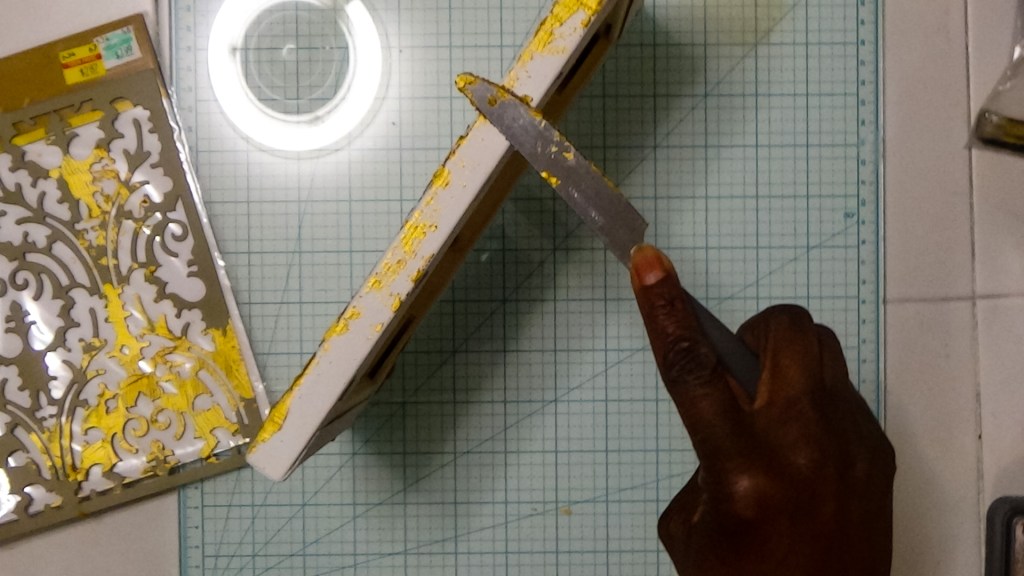
- spatula or flat knife (be careful not to cut yourself)
- extra decorative elements.
The Process
Step1. I first began by adding a thick coat of modpodge all over the front of the canvas, spreading it evenly using the brush. I then added the background paper by centering it and smoothing it down across the canvas.
I added a little more glue to the center and spread it out over top the image, making sure that there were no air pockets between it and the canvas.
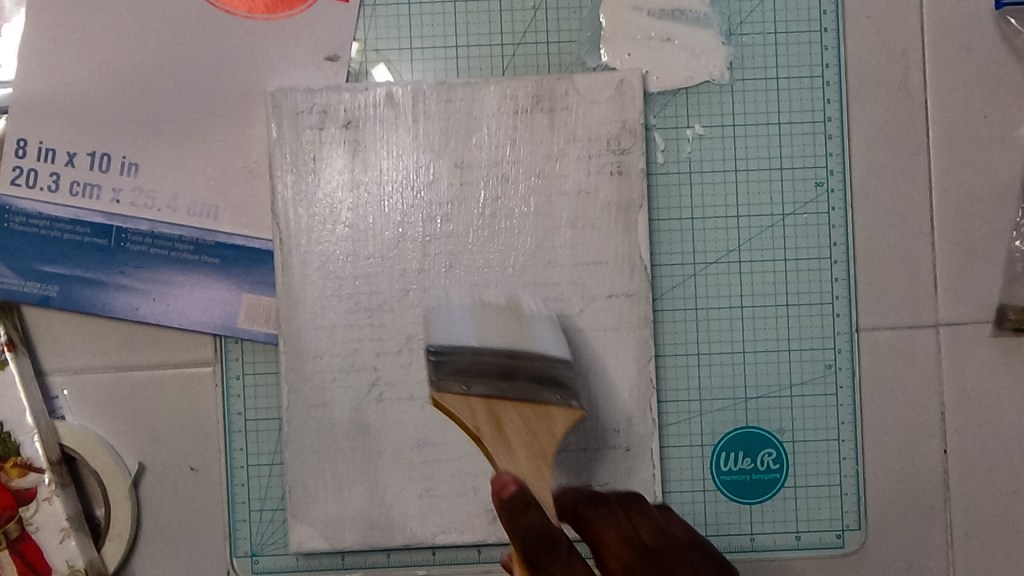
While the canvas was still wet, I tore away the excess edges, giving the paper a distressed look. I allowed the canvas to dry overnight. You don’t have to wait that long. You could dry it using an embossing tool.
Step2. Once the canvas was dry, I added a thin layer of gesso across the face of it, using vertical paint strokes. I added more paint to the center where the napkin image would get placed.
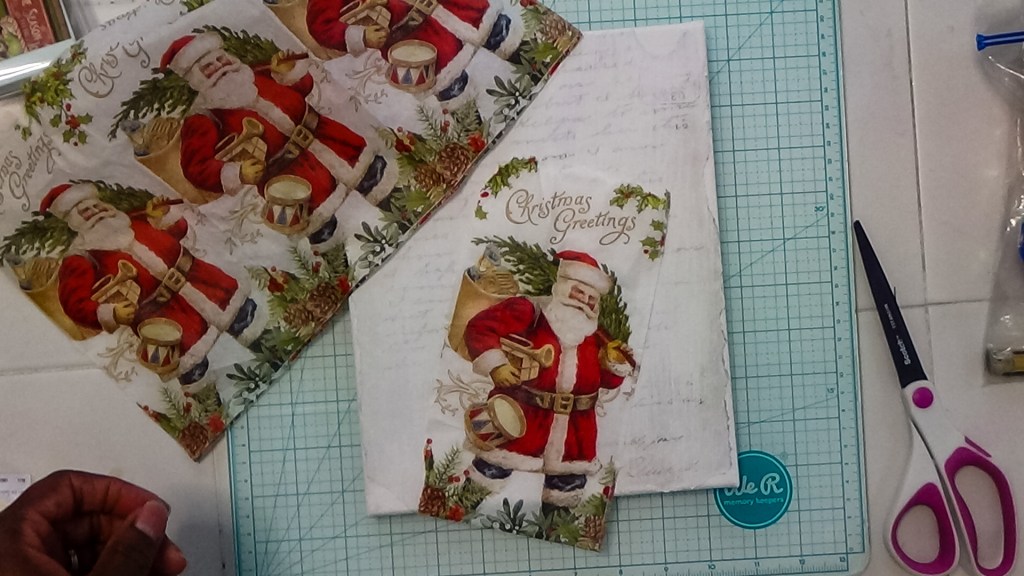
Step3. After the gesso completely dried, I got my 3-ply napkin out. I removed the first two solid napkins that were attached to the one with the image. I then tore out the image from that napkin.

I added some modpodge to the face of the canvas, in the same manner as the technique used in step 1. Next, I added the Santa Claus image by placing it in the center of the canvas. Starting in the center of the image, I gently pressed it into the canvas, using outward strokes of the brush until it was completely adhered. I let the image dry overnight.

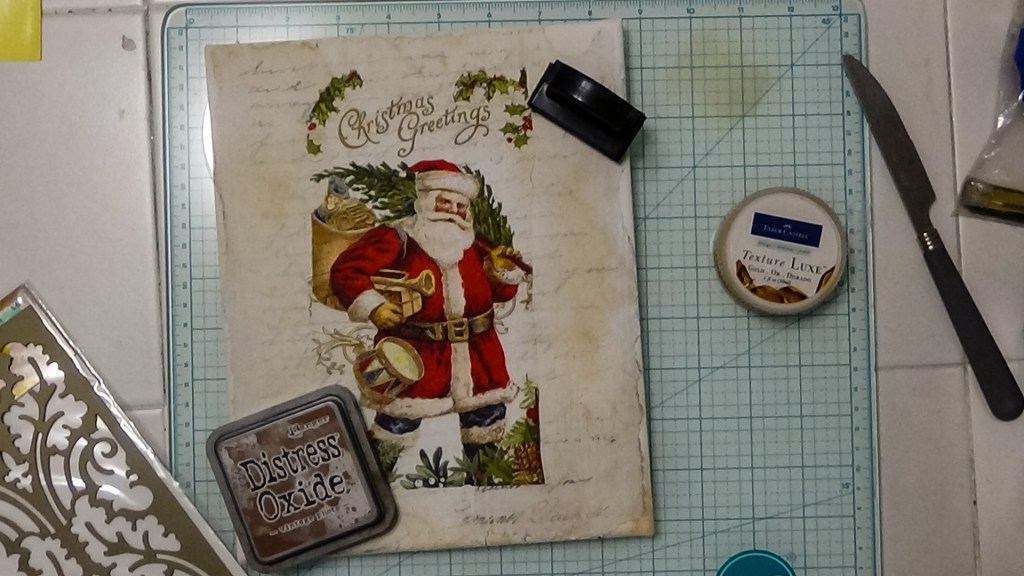
Step4. I took out my Tim Holtz distress oxide ink “Vintage Photo” and lightly distressed the canvas to give it an aged look.
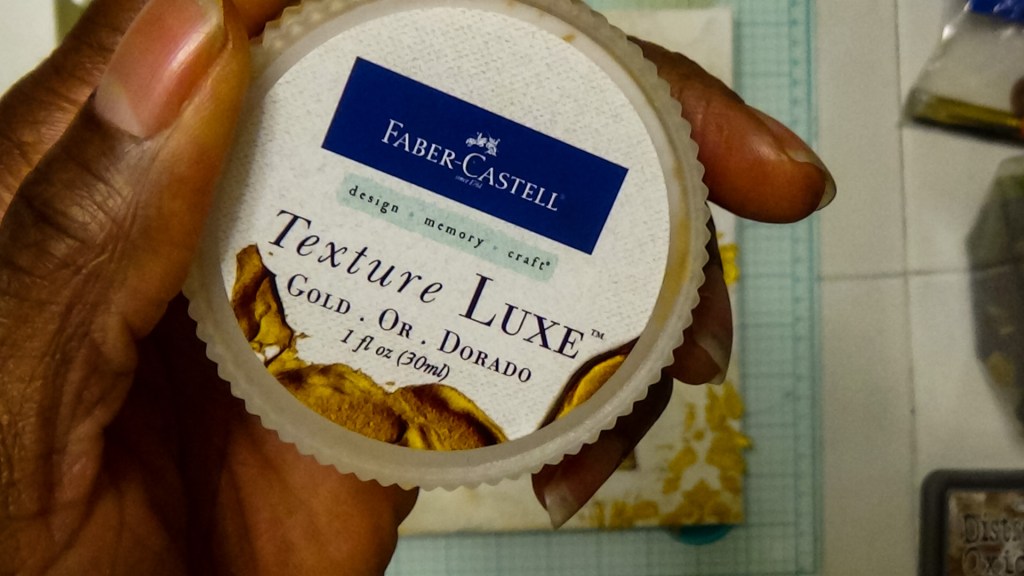
Next, I got out my “Anna Griffin 8” x 8” Pochoir Botanical Damask Stencil” and “Faber-Castell Texture Luxe-Gold” to give the canvas more dimension. I also added in some “Faber Castell Asphalt Texture” paste mixed with gesso.
I used the stencil in opposite corners of the canvas by adding a thin layer of gold texture over top of it.

Then I took the asphalt and gesso mixtures and added it to the adjacent corners. I let them dry overnight. Once again, you do not have to wait that long. Drying it with an embossing tool will work just fine.
Step 5
I then took some white paint and gesso and used a small brush (Brush #10 of Daler Rowney Flat) to highlight the stenciled and asphalt textures. I dipped my paint brush into water first and then mixed it with the paint on the canvas over top the textures to dilute the paint. I then took a dry rag and dabbed over some of the gold texture so it could bleed through the white gesso.
Next, I used some green and red acrylic paint (Americana Black Green, Apple Barrel English Ivy green, and Apple Berry Spiced Berry) to accent the shadows on Santa clause’s image. I used the green on the grass and blended some of the left-over white paint at the bottom to soften the color. I did this using brush “number 1 round” with circular motion. I added in thin streaks of grass using brush number 0/3 liner”.
Lastly, I took “brush number 1 round” and dipped it into some water and diluted gesso and plucked paint across the canvas to give it the look of snow.

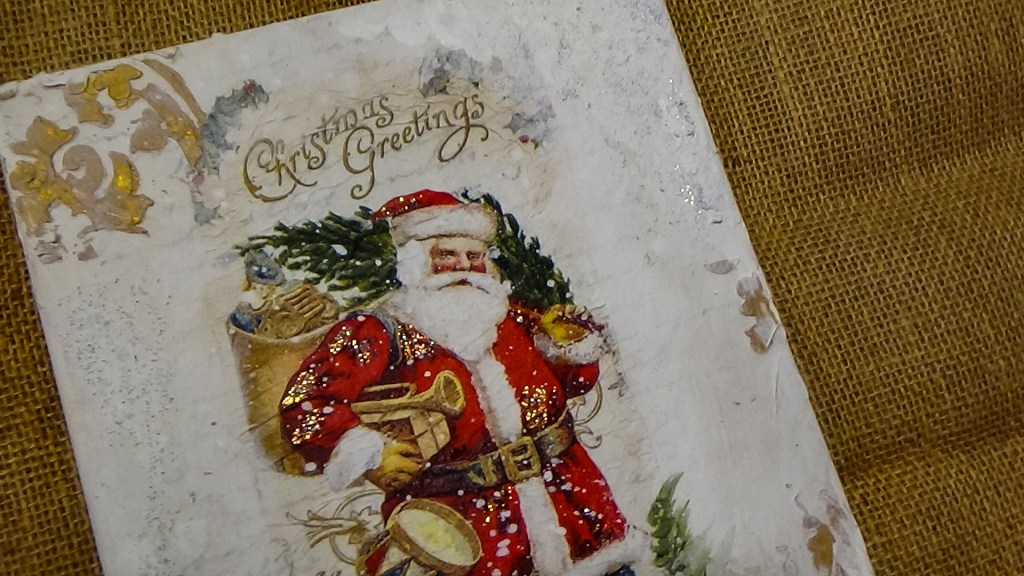
The project is complete. You can garnish it with extra elements at this point. I simply took some Diamond Stickles by Ranger and added it on Santa’s coat.


I hope this process was helpful. Have a great day!

